Tag: DotNet

  • Entity Framework vs Entity Framework Core: What’s the Difference?

    Entity Framework vs Entity Framework Core: What’s the Difference?

    Many developers assume Entity Framework (EF6) and Entity Framework Core (EF Core) are simply different versions of the same framework.

    They’re not.

    EF Core was redesigned from the ground up to meet the needs of modern .NET applications. While both are Object-Relational Mappers (ORMs), they differ significantly in architecture, performance, and capabilities.

    Let’s explore the key differences.


    What is Entity Framework (EF6)?

    Entity Framework 6 is the classic ORM designed primarily for the .NET Framework.

    It simplifies database access by allowing developers to work with C# objects instead of writing SQL for every operation.

    EF6 is mature, stable, and still maintained, making it a suitable choice for many existing .NET Framework applications.


    What is Entity Framework Core?

    Entity Framework Core is Microsoft’s modern ORM for .NET (formerly .NET Core).

    It was rewritten with a focus on:

    • Cross-platform support
    • High performance
    • Better extensibility
    • Modern application development
    • Cloud-native workloads

    It powers most new ASP.NET Core applications today.


    Key Differences

    FeatureEntity Framework (EF6)Entity Framework Core
    Target Platform.NET FrameworkModern .NET (.NET 6/7/8/9+)
    Cross-Platform❌ No✅ Yes
    PerformanceGoodBetter for most workloads
    LINQ TranslationMatureMore optimized and actively evolving
    Dependency InjectionLimitedBuilt-in support
    Batch OperationsLimitedImproved support
    MigrationsSupportedMore flexible and actively developed
    Cloud & ContainersLimitedDesigned with modern deployment in mind

    Performance

    EF Core generally performs better because it was designed with performance in mind.

    It includes improvements such as:

    • Faster query execution
    • Better SQL generation
    • More efficient change tracking
    • Compiled queries
    • Split queries for complex object graphs

    These features can make a noticeable difference in high-traffic applications.


    Which One Should You Choose?

    Choose EF6 if:

    • You’re maintaining an existing .NET Framework application.
    • Migrating to modern .NET isn’t currently feasible.
    • The application is stable and doesn’t require new EF Core features.

    Choose EF Core if:

    • You’re starting a new project.
    • You’re building an ASP.NET Core application.
    • You need cross-platform support.
    • Performance and scalability are important.
    • You want access to the latest features and ongoing improvements.

    Migration Considerations

    Migrating from EF6 to EF Core isn’t always a simple package upgrade.

    Some APIs and behaviors differ, and applications with heavy customizations may require code changes and testing.

    Plan the migration carefully and validate functionality before moving to production.


    Final Thoughts

    Both EF6 and EF Core are capable ORMs, but they’re designed for different generations of .NET development.

    • Maintaining a legacy .NET Framework application? EF6 is still a solid choice.
    • Building a modern application? EF Core should be your default choice.

    Technology evolves, and EF Core represents Microsoft’s long-term direction for data access in the .NET ecosystem.

  • Repository Pattern vs Unit of Work in .NET: Do You Really Need Both?

    Repository Pattern vs Unit of Work in .NET: Do You Really Need Both?

    If you’ve worked on ASP.NET Core projects, you’ve probably seen classes like:

    • CustomerRepository
    • OrderRepository
    • UnitOfWork

    But with Entity Framework Core, an important question arises:

    Do we still need Repository and Unit of Work, or is DbContext enough?

    The answer depends on your application’s complexity and architectural goals.


    What Is the Repository Pattern?

    A Repository acts as an abstraction between your business logic and the data access layer.

    Instead of writing database queries throughout your application, all data operations are centralized.

    Example:

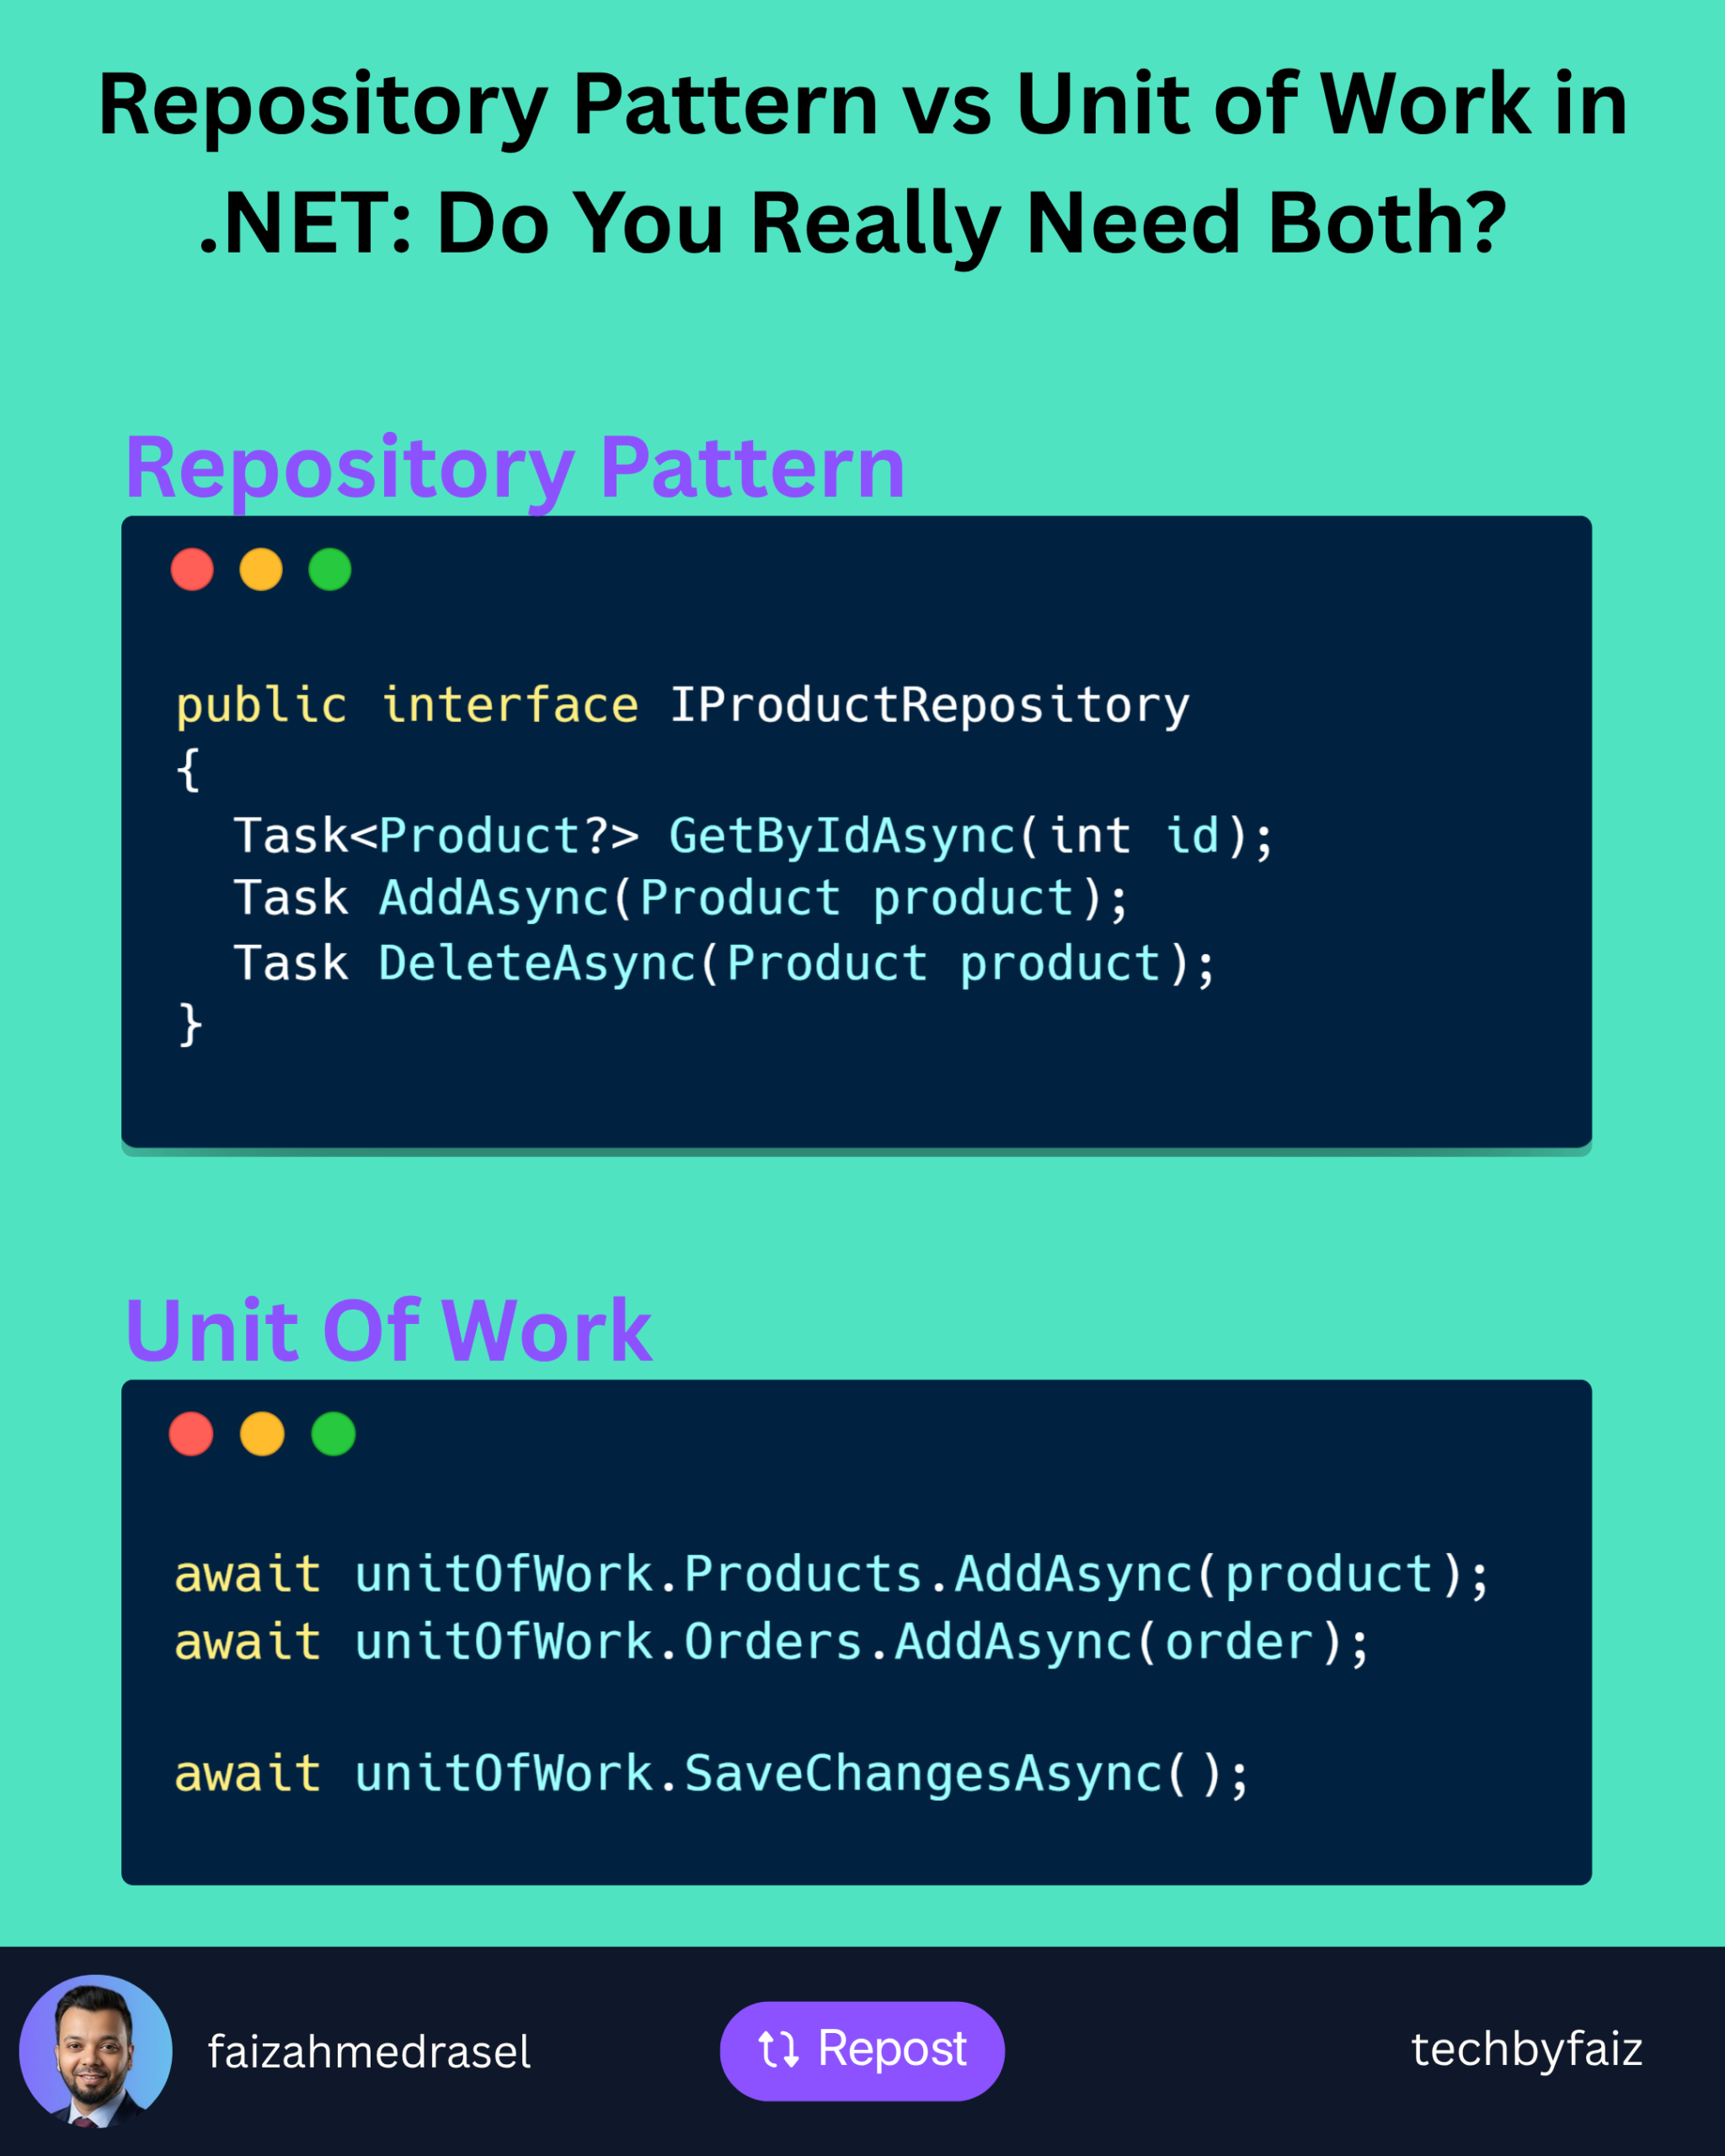
    public interface IProductRepository
    {
        Task<Product?> GetByIdAsync(int id);
        Task AddAsync(Product product);
        Task DeleteAsync(Product product);
    }
    

    The service interacts with the repository instead of directly with Entity Framework.

    Benefits

    • Separates business logic from data access.
    • Easier to mock during unit testing.
    • Centralizes reusable queries.
    • Improves maintainability in large projects.

    What Is the Unit of Work Pattern?

    The Unit of Work coordinates multiple repositories so they participate in a single transaction.

    Instead of saving changes after every repository operation, you commit them together.

    Example:

    await unitOfWork.Products.AddAsync(product);
    await unitOfWork.Orders.AddAsync(order);
    
    await unitOfWork.SaveChangesAsync();
    

    If one operation fails, the entire transaction can be rolled back.


    Doesn’t EF Core Already Provide These?

    Yes—and this is where many developers get confused.

    DbSet<T> behaves much like a Repository

    It already provides methods such as:

    • Add()
    • Remove()
    • Find()
    • Update()

    DbContext behaves like a Unit of Work

    It:

    • Tracks entity changes.
    • Coordinates updates.
    • Executes a single SaveChanges() or SaveChangesAsync().
    • Wraps changes in a transaction when appropriate.

    Because of this, many developers consider custom Repository and Unit of Work implementations unnecessary for simple CRUD applications.


    When Should You Use Custom Repository and Unit of Work?

    They make sense when:

    • Your application is large and follows Clean Architecture or Domain-Driven Design (DDD).
    • Multiple data sources need a consistent abstraction.
    • You have complex queries reused across many services.
    • You want to isolate EF Core from the application layer.
    • You anticipate changing the data access technology in the future.

    When Might They Be Unnecessary?

    For smaller applications that use EF Core exclusively, adding generic repositories can introduce extra complexity without much benefit.

    In these cases, injecting DbContext directly into services is often simpler and perfectly acceptable.


    My Rule of Thumb

    • Small to medium CRUD applications: DbContext is usually enough.
    • Large enterprise applications: A well-designed Repository and Unit of Work layer can improve organization, testability, and maintainability.

    The important point isn’t to follow a pattern blindly—it’s to choose the level of abstraction your project actually needs.


    Final Thoughts

    Repository and Unit of Work are valuable patterns, but they’re not mandatory in every ASP.NET Core application.

    EF Core already implements many of their responsibilities.

    Before adding another abstraction layer, ask yourself:

    Does this simplify my application, or does it simply add more code to maintain?

    Good architecture isn’t about using more patterns—it’s about using the right patterns for the problem you’re solving.

  • If-Else vs Ternary Operator in C#: When Should You Use Each?

    If-Else vs Ternary Operator in C#: When Should You Use Each?

    As C# developers, we often need to make decisions in our code.

    Two common ways to do this are:

    • if-else
    • The ternary operator (?:)

    Both achieve the same goal, but choosing the right one can make your code either easier—or harder—to read.

    Let’s explore when each approach is the better choice.

    Using if-else

    The if-else statement is ideal when the logic is more than a simple decision.

    Example:

    if (age >= 18)
    {
        category = "Adult";
    }
    else
    {
        category = "Minor";
    }
    

    This style is easy to understand, especially when additional conditions or multiple statements are involved.

    When to Use if-else

    Use if-else when:

    • You have multiple statements to execute.
    • The logic is complex.
    • You need nested conditions.
    • Readability is more important than brevity.

    Using the Ternary Operator

    The ternary operator provides a shorter way to assign a value based on a condition.

    Syntax:

    condition ? valueIfTrue : valueIfFalse;
    

    Example:

    string category = age >= 18 ? "Adult" : "Minor";
    

    This is concise, expressive, and easy to read.


    A Good Use Case

    The ternary operator works well for simple value assignments.

    string status = isActive ? "Active" : "Inactive";
    

    Simple.

    Readable.

    No unnecessary lines of code.


    A Bad Use Case

    Avoid chaining multiple ternary operators.

    string result = score >= 80
        ? "Excellent"
        : score >= 60
            ? "Good"
            : score >= 40
                ? "Average"
                : "Fail";
    

    Although valid, this quickly becomes difficult to read and maintain.

    An if-else block communicates the same logic much more clearly.


    Comparison

    ScenarioRecommended
    Simple value assignment✅ Ternary Operator
    Multiple statements✅ If-Else
    Complex business logic✅ If-Else
    Nested conditions✅ If-Else
    Short, readable conditions✅ Ternary Operator

    Best Practices

    ✔ Use the ternary operator only for simple expressions.

    ✔ Prefer if-else for complex decision-making.

    ✔ Avoid deeply nested ternary operators.

    ✔ Prioritize readability over writing fewer lines of code.

    Remember:

    Code is read far more often than it is written.


    Final Thoughts

    The ternary operator is a great tool—but like any tool, it should be used appropriately.

    If it makes your code clearer, use it.

    If it makes someone stop and think, an if-else statement is probably the better choice.

    The goal isn’t to write the shortest code—it’s to write code that’s easy for your future self and your teammates to understand.

  • What If a User Uploads a Dangerous File to Your Server? Here’s How to Prevent It.

    What If a User Uploads a Dangerous File to Your Server? Here’s How to Prevent It.

    File upload is one of the most common features in web applications—but it’s also one of the most targeted by attackers.

    Imagine a user uploads a file named:

    invoice.pdf.exe
    

    Or renames a malicious executable to:

    resume.pdf
    

    If your application trusts only the file name or extension, you could expose your server to serious security risks.

    A secure file upload system should never rely on a single validation step.

    1. Validate the File Extension

    Allow only the file types your application actually needs.

    Example:

    • .pdf
    • .jpg
    • .png
    • .docx

    Reject everything else.

    Remember: This is your first line of defense—not your only one.


    2. Verify the MIME Type

    Don’t trust the extension alone.

    Check the file’s MIME type sent by the client.

    For example:

    • application/pdf
    • image/jpeg
    • image/png

    Keep in mind that MIME types can also be spoofed, so continue with additional checks.


    3. Validate the File Signature (Magic Numbers)

    The most reliable validation is checking the file’s binary signature.

    For example:

    • PDF → %PDF
    • PNG → 89 50 4E 47
    • JPEG → FF D8 FF

    If the file signature doesn’t match the expected format, reject the upload.


    4. Limit File Size

    Prevent attackers from uploading extremely large files.

    Example:

    • Images: 5 MB
    • Documents: 20 MB

    This reduces the risk of storage abuse and denial-of-service attacks.


    5. Rename Uploaded Files

    Never store files using the original filename.

    Instead, generate a unique name.

    Example:

    3b8b2d1d-ef7d-4db2-8a8c-0f5d91a0f4a7.pdf
    

    This avoids filename collisions and reduces information disclosure.


    6. Store Files Outside the Web Root

    Avoid storing uploaded files in directories that can execute code.

    Instead:

    • Store files outside the web root.
    • Serve them through a controller or API after authorization.

    This prevents direct execution of uploaded files.


    7. Scan for Malware

    Integrate an antivirus solution to scan uploaded files before making them available.

    This is especially important for systems that accept documents from external users.


    8. Restrict File Permissions

    Uploaded files should never have execute permissions.

    Grant only the minimum permissions required to read or write the file.


    9. Authorize Access

    Not every uploaded file should be publicly accessible.

    Always verify that the requesting user has permission to download or view the file.


    10. Log Upload Activity

    Record important details such as:

    • User ID
    • IP address
    • File name
    • File size
    • Upload time
    • Validation failures

    Logs help detect suspicious activity and support incident investigations.


    Final Thoughts

    Secure file uploads are about defense in depth.

    Don’t rely on a single validation.

    A robust upload pipeline should include:

    • Extension validation
    • MIME type verification
    • File signature checks
    • Size limits
    • Malware scanning
    • Secure storage
    • Proper authorization

    Security isn’t a single feature—it’s a combination of small decisions that work together to protect your application.

  • 𝗔𝗦𝗣.𝗡𝗘𝗧 𝗖𝗼𝗿𝗲-এ 𝗮𝗽𝗽.𝗨𝘀𝗲𝗦𝘄𝗮𝗴𝗴𝗲𝗿() এবং 𝗮𝗽𝗽.𝗨𝘀𝗲𝗦𝘄𝗮𝗴𝗴𝗲𝗿𝗨𝗜() কেন ব্যবহার করা হয়?

    𝗔𝗦𝗣.𝗡𝗘𝗧 𝗖𝗼𝗿𝗲-এ 𝗮𝗽𝗽.𝗨𝘀𝗲𝗦𝘄𝗮𝗴𝗴𝗲𝗿() এবং 𝗮𝗽𝗽.𝗨𝘀𝗲𝗦𝘄𝗮𝗴𝗴𝗲𝗿𝗨𝗜() কেন ব্যবহার করা হয়?

    ধরুন, আপনি একটি নতুন Web API তৈরি করেছেন।

    সব endpoint ঠিকমতো কাজ করছে।

    আপনি Postman দিয়ে test করছেন।

    কিন্তু হঠাৎ আপনার টিমের একজন Developer এসে বলল,

    “API-এর documentation কোথায়?”

    আপনি বললেন,

    “Postman Collection আছে।”

    সে আবার বলল,

    “নতুন Developer join করলে কি Postman Collection দিয়েই সব বুঝতে হবে?”

    এখানেই Swagger-এর প্রয়োজনীয়তা শুরু।

    Swagger আসলে কী?

    Swagger হলো এমন একটি tool যা আপনার Web API-এর documentation automatically তৈরি করে।

    অর্থাৎ, আপনার API-তে কী কী endpoint আছে,

    • কোন URL
    • কোন HTTP Method (GET, POST, PUT, DELETE)
    • কী parameter লাগবে
    • কী response আসবে

    সবকিছু সুন্দরভাবে একটি UI-তে দেখিয়ে দেয়।


    তাহলে app.UseSwagger() কী করে?

    app.UseSwagger();
    

    এই লাইনটি Swagger-এর JSON documentation generate করে।

    যেমন:

    /swagger/v1/swagger.json
    

    এই JSON file-এর মধ্যেই আপনার পুরো API-এর description থাকে।

    অর্থাৎ এটি UI নয়।

    এটি শুধুমাত্র API-এর metadata তৈরি করে।


    তাহলে app.UseSwaggerUI() কী করে?

    app.UseSwaggerUI();
    

    এই লাইনটি সেই JSON file-কে একটি সুন্দর Web UI-তে দেখায়।

    ফলে Browser থেকে আপনি দেখতে পারেন—

    ✅ সব Endpoint

    ✅ Request Body

    ✅ Parameters

    ✅ Response

    ✅ এমনকি Browser থেকেই API Call করতে পারেন।


    বাস্তব উদাহরণ

    ধরুন আপনি একটি Food Delivery API বানিয়েছেন।

    Swagger UI খুললে দেখতে পারবেন—

    GET     /api/restaurants
    
    GET     /api/restaurants/{id}
    
    POST    /api/orders
    
    PUT     /api/orders/{id}
    
    DELETE  /api/orders/{id}
    

    প্রতিটি endpoint-এ ক্লিক করে আপনি Request পাঠাতে পারবেন।

    Postman খুলারও দরকার হবে না।


    যদি শুধু UseSwagger() লিখেন?

    তাহলে JSON তৈরি হবে।

    কিন্তু Browser-এ সুন্দর UI পাবেন না।


    যদি শুধু UseSwaggerUI() লিখেন?

    Swagger UI দেখানোর জন্য JSON দরকার।

    UseSwagger() না থাকলে UI কাজ করতে পারবে না।

    অর্থাৎ—

    দুইটি middleware একে অপরের উপর নির্ভরশীল।


    Development Environment-এ কেন বেশি ব্যবহার করা হয়?

    অনেক Project-এ আপনি এমন Code দেখবেন—

    if (app.Environment.IsDevelopment())
    {
        app.UseSwagger();
        app.UseSwaggerUI();
    }
    

    কারণ Production Environment-এ অনেক সময় API documentation public রাখা হয় না।

    Security-এর কারণেও অনেক প্রতিষ্ঠান Production-এ Swagger disable করে রাখে।


    আমার পরামর্শ

    Swagger শুধু API দেখানোর জন্য নয়।

    এটি Team Collaboration অনেক সহজ করে।

    নতুন Developer onboarding, Frontend integration, QA testing—সব ক্ষেত্রেই Swagger অসাধারণ একটি tool।

    আমার মতে, ASP.NET Core শিখতে গেলে Swagger বোঝা বাধ্যতামূলক।

    কারণ এটি শুধু documentation নয়, এটি আপনার API-এর “Interactive User Manual”।

  • 𝗪𝗵𝗮𝘁’𝘀 𝗡𝗲𝘄 𝗶𝗻 𝗖# 𝟭𝟰: 𝗠𝗼𝗱𝗲𝗿𝗻 𝗙𝗲𝗮𝘁𝘂𝗿𝗲𝘀 𝗧𝗵𝗮𝘁 𝗠𝗮𝗸𝗲 𝗬𝗼𝘂𝗿 𝗖𝗼𝗱𝗲 𝗖𝗹𝗲𝗮𝗻𝗲𝗿 𝗮𝗻𝗱 𝗠𝗼𝗿𝗲 𝗘𝘅𝗽𝗿𝗲𝘀𝘀𝗶𝘃𝗲

    𝗪𝗵𝗮𝘁’𝘀 𝗡𝗲𝘄 𝗶𝗻 𝗖# 𝟭𝟰: 𝗠𝗼𝗱𝗲𝗿𝗻 𝗙𝗲𝗮𝘁𝘂𝗿𝗲𝘀 𝗧𝗵𝗮𝘁 𝗠𝗮𝗸𝗲 𝗬𝗼𝘂𝗿 𝗖𝗼𝗱𝗲 𝗖𝗹𝗲𝗮𝗻𝗲𝗿 𝗮𝗻𝗱 𝗠𝗼𝗿𝗲 𝗘𝘅𝗽𝗿𝗲𝘀𝘀𝗶𝘃𝗲

    C# continues to evolve with every release, focusing on making developers more productive while keeping code clean, readable, and maintainable.

    C# 14 introduces several improvements that help developers write simpler and more expressive code.

    Here are some notable features:

    1. Extension Members

    C# 14 expands extension methods with a more powerful concept called extension members.

    Previously, extension methods allowed adding methods to existing types without modifying them.

    Now, extension members allow developers to add more than just methods, including properties and other members.

    This makes APIs easier to design and improves code organization.


    2. Null-Conditional Assignment

    C# 14 improves null handling by allowing assignments through null-conditional operators.

    Before:

    if (customer != null)
    {
        customer.Name = "Faiz";
    }
    

    With C# 14:

    customer?.Name = "Faiz";
    

    This reduces unnecessary null checks and improves readability.


    3. Field Keyword

    C# 14 introduces the field keyword, making property implementations cleaner.

    Before:

    private string _name;
    
    public string Name
    {
        get => _name;
        set => _name = value;
    }
    

    With C# 14:

    public string Name
    {
        get;
        set => field = value;
    }
    

    This reduces boilerplate code while keeping control over property behavior.


    4. More Flexible Method Overloads

    C# 14 improves overload resolution and allows developers to create APIs with better flexibility and fewer workarounds.

    This helps when designing libraries and reusable components.


    5. Improved Developer Experience

    Besides new language features, C# 14 continues improving:

    ✅ Code readability
    ✅ Developer productivity
    ✅ Performance opportunities
    ✅ Modern application development patterns


    The goal of every C# update is not just adding features.

    The real goal is helping developers write code that is:

    ✔ Easier to understand
    ✔ Easier to maintain
    ✔ Less error-prone
    ✔ More aligned with modern software practices

    As .NET developers, staying updated with language evolution helps us make better technical decisions.

    💬 Which C# 14 feature are you most excited to use in your projects?

    ♻️ If you found this helpful, feel free to repost and share it with your network.

    Follow Engineer Faiz for more insights on software engineering and technology.

    #csharp #dotnet #softwareengineering #backenddevelopment #programming

  • EF Core Pagination: The Right Way to Handle Large Data Sets

    EF Core Pagination: The Right Way to Handle Large Data Sets

    EF Core Pagination: The Right Way to Handle Large Data Sets

    Returning thousands of records from an API might work during development.

    But what happens when your table has millions of rows?

    This is where pagination becomes essential.


    A common mistake:

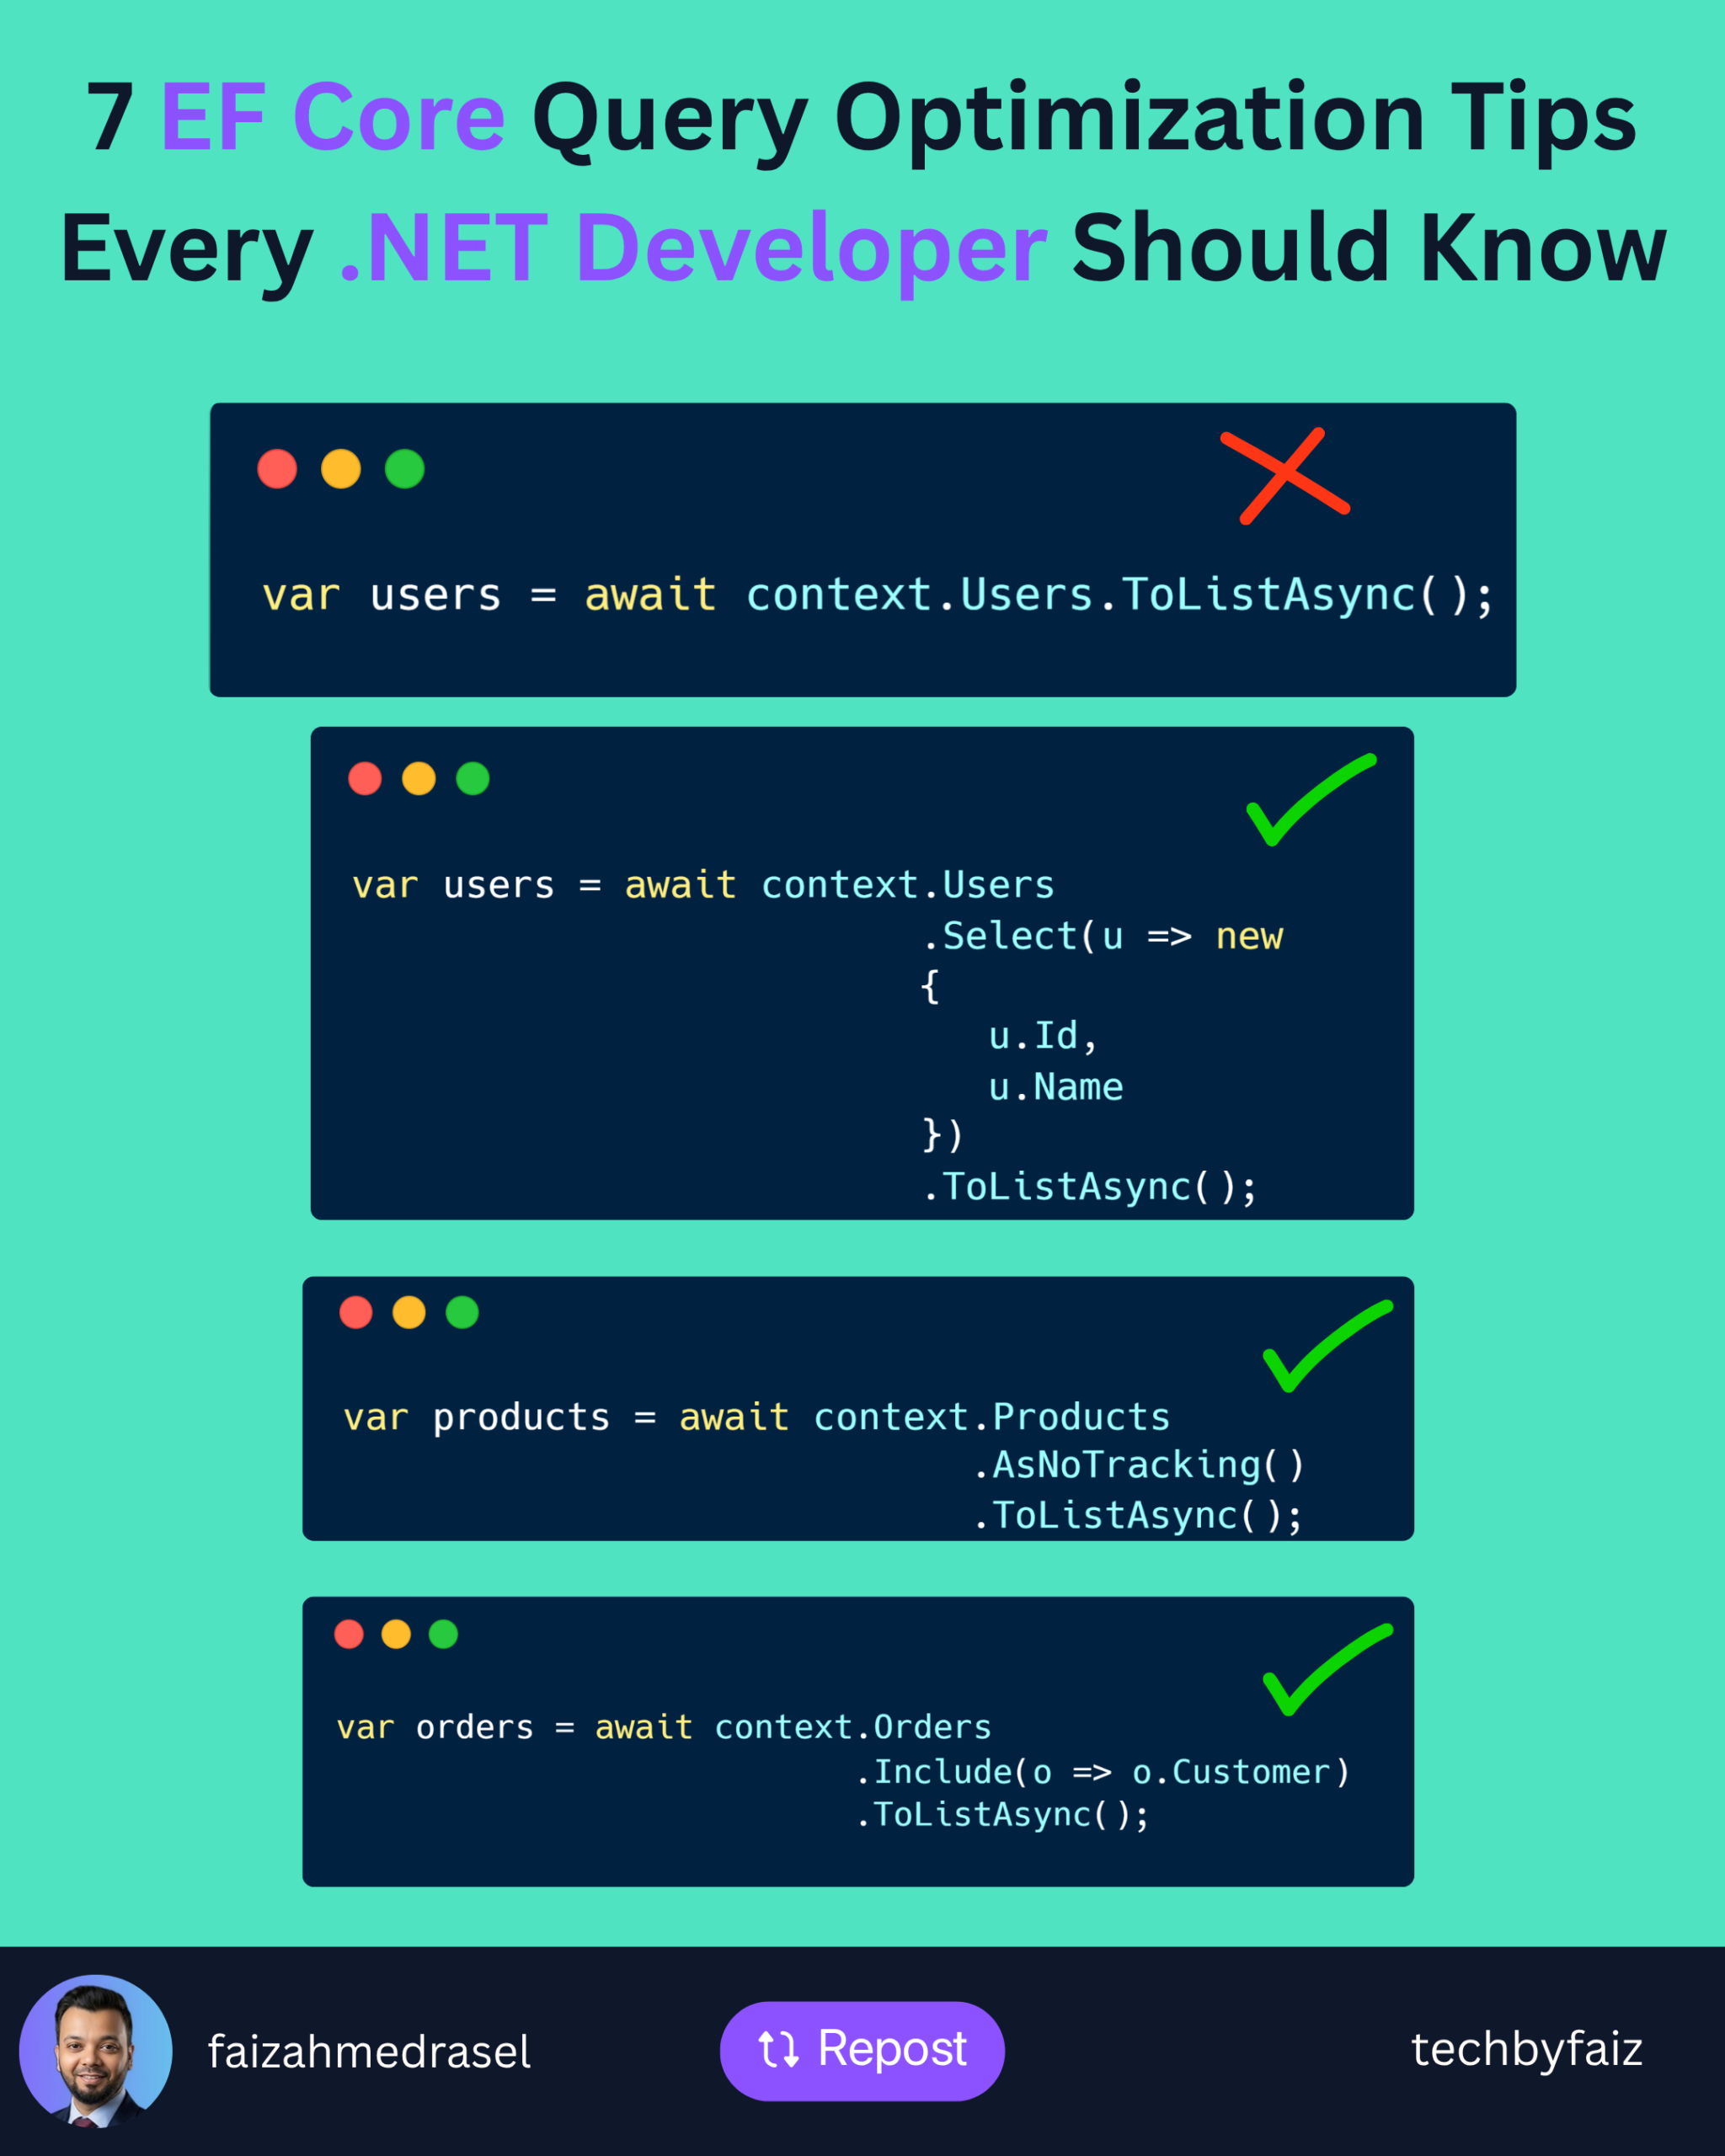
    var users = await _context.Users
        .ToListAsync();
    

    It loads everything into memory.

    Problems:

    ❌ Higher memory usage

    ❌ Slower response time

    ❌ Increased database load

    ❌ Poor user experience


    Better Approach: Pagination with EF Core

    var users = await _context.Users
        .OrderBy(x => x.Id)
        .Skip((pageNumber - 1) * pageSize)
        .Take(pageSize)
        .ToListAsync();
    

    How it works:

    Skip()
    ➡️ Ignores previous pages

    Take()
    ➡️ Returns only the required number of records

    Example:

    PageNumber = 3
    PageSize = 20
    

    EF Core skips:

    (3 - 1) × 20 = 40 records
    

    Then returns:

    Next 20 records
    

    Important Pagination Practices

    ✅ Always use OrderBy()

    Without ordering, database results are not guaranteed.

    ✅ Use projection when possible

    Instead of:

    .ToListAsync()
    

    Prefer:

    .Select(x => new UserDto
    {
        Id = x.Id,
        Name = x.Name
    })
    .ToListAsync();
    

    Only fetch the data you need.

    ✅ Return pagination metadata

    Example:

    {
      "pageNumber": 1,
      "pageSize": 20,
      "totalRecords": 500
    }
    

    For Large Tables

    Skip() and Take() work well for most scenarios.

    But for millions of records, consider:

    Keyset Pagination (Seek Pagination)

    It avoids the performance cost of skipping large numbers of rows.


    💡 Rule of thumb:

    Pagination is not just a UI feature.

    It is a database performance strategy.

    A scalable API should control how much data it retrieves and sends.


    👇 What pagination approach do you prefer in your APIs?

    Offset pagination (Skip/Take) or Keyset pagination?

    ♻️ If you found this helpful, feel free to repost and share it with your network.

    👉 Follow Faiz Ahmed Rasel for more .NET tips, tutorials, and deep dives.

    #DotNet #EntityFrameworkCore #CSharp #WebAPI #BackendEngineering